BMW 5 Series: Head-up Display
Concept
This system projects important information into the driver's field of vision, for instance the speed.
The driver can get information without averting his or her eyes from the road.
General information
Follow the information on cleaning the Head-up Display.
Overview
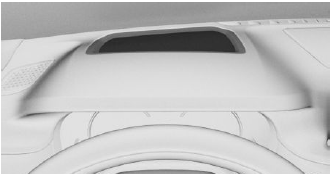
Switching on/off
Via iDrive:
1. "My Vehicle".
2. "iDrive settings".
3. "Displays".
4. "Head-Up Display".
5. "Head-Up Display".
Display
Overview
The following information is displayed on the Head-up Display:
- Vehicle speed.
- Navigation instructions.
- Check Control messages.
- Selection list in the instrument cluster.
- Driver assistance systems.
Some of this information is only displayed briefly as needed.
Selecting the view
Various views are available for the Head-up Display.
Via iDrive:
1. "My Vehicle".
2. "iDrive settings".
3. "Displays".
4. "Head-Up Display".
5. Select the desired setting:
- "STANDARD": all displays in the Head-up Display are active.
- "REDUCED": the displays in the Head-up Display are reduced to the minimum.
- "INDIVIDUAL": all displays in the Head-up Display are active. Individual displays such as Check Control messages can be selected individually.
The setting is stored for the driver profile currently used.
Selecting displays in the Head-up Display
Via iDrive:
1. "My Vehicle".
2. "iDrive settings".
3. "Displays".
4. "Head-Up Display".
5. "INDIVIDUAL".
6. Select the desired setting.
The setting is stored for the driver profile currently used.
Setting the brightness
The brightness is automatically adjusted to the ambient brightness.
The basic setting can be adjusted manually.
Via iDrive:
1. "My Vehicle".
2. "iDrive settings".
3. "Displays".
4. "Head-Up Display".
5. "Brightness".
6. Turn the Controller until the desired brightness is set.
7. Press the Controller.
When the low beams are switched on, the brightness of the Head-up Display can be additionally influenced using the instrument lighting.
Adjusting the height
Via iDrive:
1. "My Vehicle".
2. "iDrive settings".
3. "Displays".
4. "Head-Up Display".
5. "Height".
6. Turn the Controller until the desired height is reached.
7. Press the Controller.
The setting is stored for the driver profile currently used.
The height of the Head-up Display can also be stored using the memory function.
Setting the rotation
The Head-up Display view can be rotated.
Via iDrive:
1. "My Vehicle".
2. "iDrive settings".
3. "Displays".
4. "Head-Up Display".
5. "Rotation".
6. Turn the Controller until the desired setting is selected.
7. Press the Controller.
Visibility of the display
The visibility of the displays in the Head-up Display is influenced by the following factors:
- Seat position.
- Objects on the cover of the Head-up Display.
- Sunglasses with certain polarization filters.
- Wet roads.
- Unfavorable light conditions.
If the image is distorted, have the basic settings checked by a dealer's service center or another qualified service center or repair shop.
Special windshield
The windshield is part of the system.
The shape of the windshield makes it possible to display a precise image.
A film in the windshield prevents double images from being generated.
For this reason, it is strongly suggested to have the special windshield replaced by a dealer's service center or another qualified service center or repair shop, if necessary.
READ NEXT:
 Overview
Switches in the vehicle
The light switch element is located next to the
steering wheel.
Front fog lights.
Night Vision.
Lights off.
Daytime running lights.
Parking lights.
Automatic headlight c
Welcome lights and
headlight courtesy delay
feature
Welcome lights
General information
Depending on the equipment, the exterior lighting
of the vehicle can be set individually.
Activating/deactivating
Position of switch:
Via iDrive:
1. "My Vehicle".
SEE MORE:
BMW Roadside Assistance
Concept
Contact the BMW Group Roadside Assistance if
assistance is needed in the event of a breakdown.
General information
In the event of a breakdown, data on the vehicle's
condition is sent to the vehicle manufacturer.
There are various ways of making contact.
Via a Check Control message.
Call
Surround View
Surround View shows the vehicle surroundings and displays them in TOP View
and 3D View on the
Central Information Display.
The system comprises the front camera, the two cameras integrated in the
exterior mirrors, the rear
view camera (RFK) and the Top Rear Side View Camera (TRSVC) control unit.
